The Imagery Navigator helps you view and download different kinds of imagery and raster data.
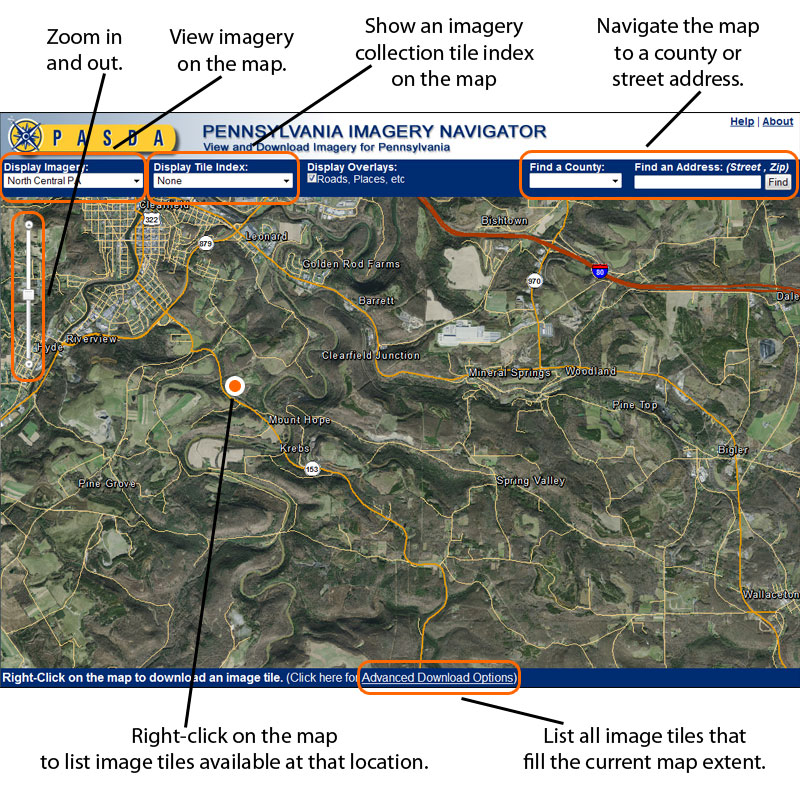
To navigate the map:
- Double-click on the map to zoom in.
- Click and drag the map to recenter your view.
- Use the slider bar in the upper-left corner of the map to zoom in out.
- Hold down your SHIFT key and drag a box on the map to zoom to a specific area.
To view imagery and features on the map:
- Use the 'Display Imagery' dropdown list to choose the kind of imagery you want to see on the map.
- Use the 'Display Tile Index' dropdown list to view the boundaries of the individual data files that compose each imagery collection.
- Use the 'Display Overlays' option list to turn on/off the roads and labels.
To download imagery, do one of the following:
- Right-Click anywhere on the map to see a list of the individual data files that cover the area you clicked.
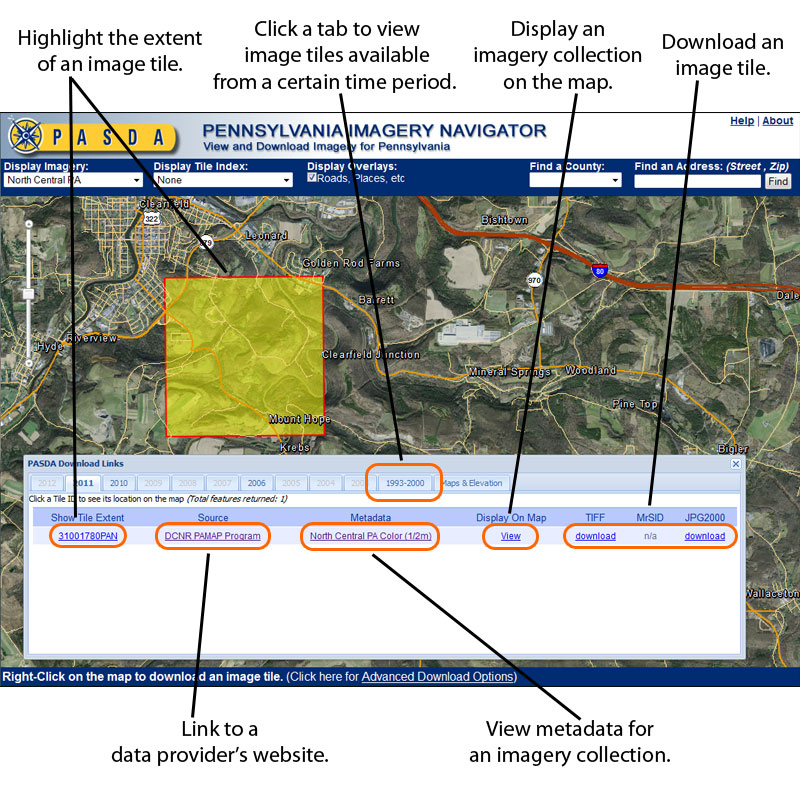
- In the PASDA Download Links window, tabs separate imagery into time periods from which downloads are available.
- Click the 'Show Tile Extent' link to view an image tile's extent on the map.
- Click the 'Source' link to access the Website of the data provider.
- Click the 'Metadata' link to view metadata of the imagery collection.
- Click the 'Display on Map' to view the imagery collection on the map.
- Click a 'download' link to download the image file in the indicated format (TIFF, MrSID, JPG).
- Click the 'Advanced Download Options' link at the bottom of the page.
- This will present ways to identify multiple data files that cover a larger area.
- Click the 'Download tiles in the current map extent' to see lists of all data files that cover your current map view.
- Use the links in the Download Links window to view the location of each data file and download it.